SOLAR POWERED LUNCH BOX

Sexy.
Overview
After seeing that I could buy a basic battery-powered refrigeration unit, I had the idea to build a battery-powered cooler. A battery-powered cooler is not a novel idea. In fact, Igloo has their own battery-powered cooler. Furthermore, in the Amazon review section for the refrigeration unit, I found a DIY builder who had the same plan: using the unit in a Styrofoam cooler.
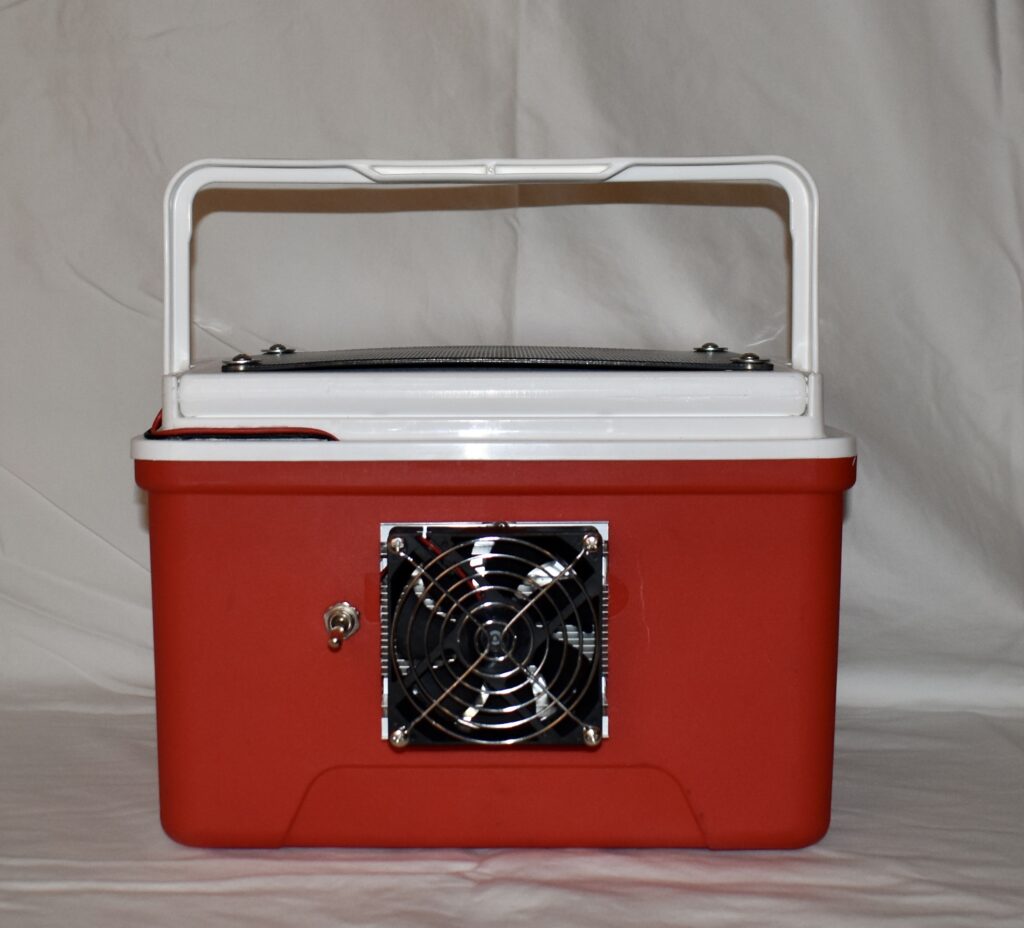
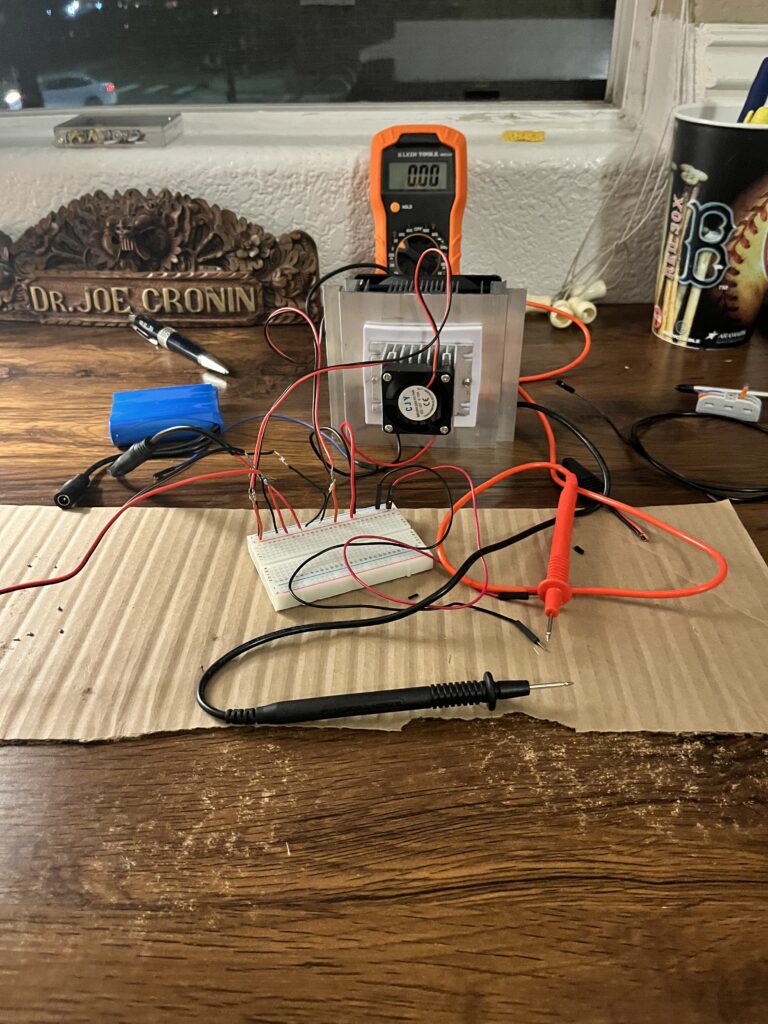
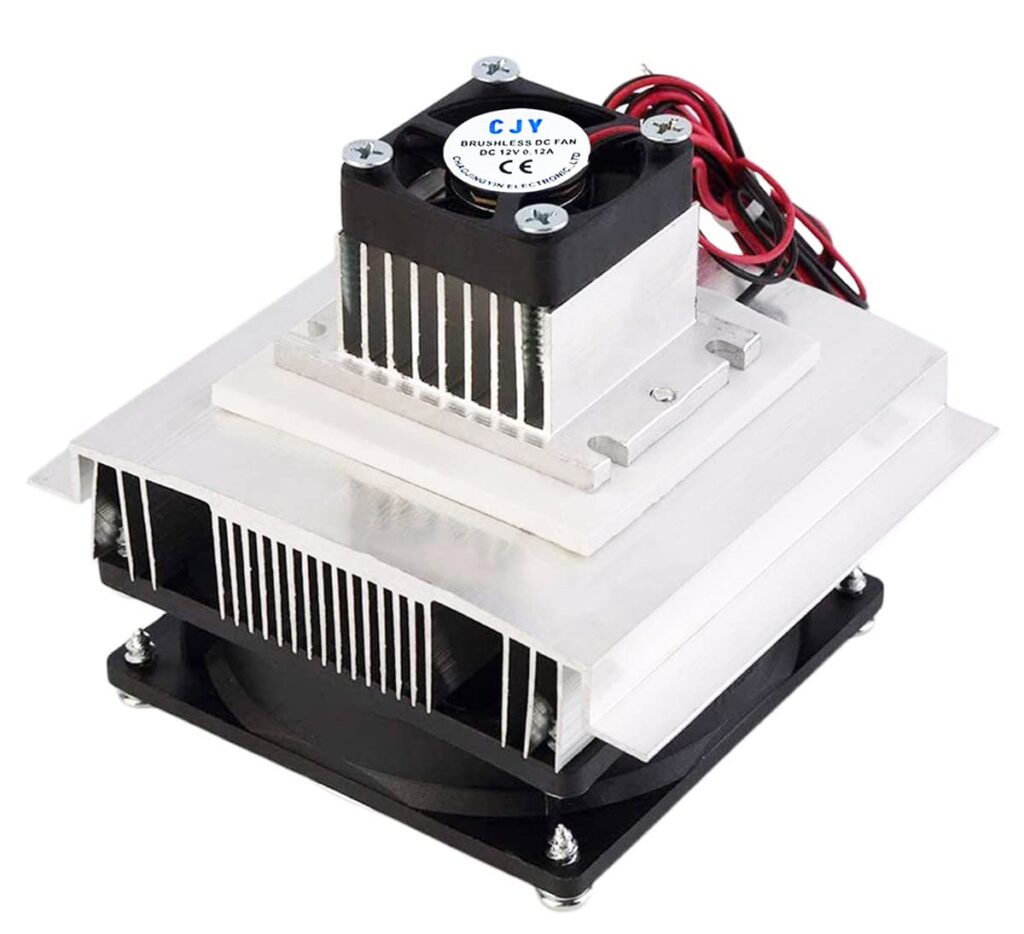
My gimmick was to avoid paying $400 for the Igloo cooler and instead make my own—one that was more durable and aesthetically pleasing than a janky Styrofoam contraption. Here’s what’s in the picture:
| Part | Quantity | Total Cost | Link |
| Igloo 9 QT Laguna Ice Chest | 1 | 13 | Cooler |
| 12V Thermoelectric Peltier Refrigeration Cooling System | 1 | 19 | Fridge |
| 12V 6W Solar Panel | 1 | 20 | Solar Panel |
| 12V 30A Toggle Switch | 1 | 4 | Switch |
| Screws / Washers | 4 | 0 | Found in my junk drawer |
| $56 |
Now, I spent WAYYY more than $56 to assemble this device. First, I didn’t think through the physical dimensions of the cooler and initially bought a solar panel that was too long. Also, please consider that I did not own a soldering iron, voltmeter, or rotary tool and had to purchase all of that equipment (though I’m very pleased that I now have all of it at my disposal).
Despite spending over $300 (good lord) to build this, it was a wonderful way to pass the time.
Construction
Beyond my experience designing a horribly wobbly stool and a surprisingly elegant hat rack in the Hingham Middle School wood shop, this was a novel experience in planning and building a physical device. I started with what I know best: the electrical circuit.
Before laying my hands on any cooler, I first bought and tested all the electrical equipment—the battery, solar panel, and refrigeration unit.
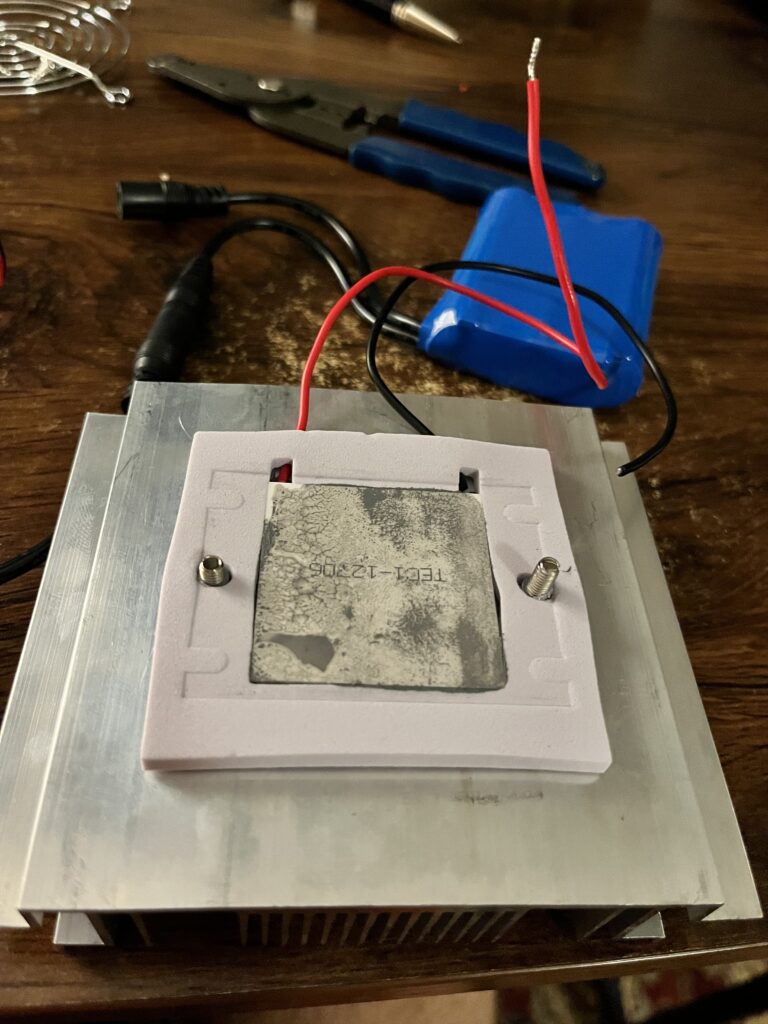
First, I connected the battery and refrigeration unit (henceforth referred to as the fridge) and successfully powered both fans and the Peltier plate. Without the solar panel, the system ran for 36 minutes.
Then I introduced the solar panel. The panel itself is rather useless: it is unable to charge the battery and only produces enough power to turn on the smaller of the two fans. However, when running in parallel with the battery, it improved the system runtime from 36 minutes to 42 minutes when placed in full sunlight. This matched my estimates from the component specifications:
| Component | Voltage (v) | Current (i) | Energy (Wh) |
| Battery | 12v | 30 | |
| Fan (small) | 12v | 0.12 | 1.44 |
| Fan (large) | 12v | 0.3 | 3.6 |
| Pelletier plate | 12v | 4.5 | 54 |
| ~60 |
With just the battery, the stored energy of 30 Wh should power the cooling system for about 30 minutes (which is an underestimate of the measured 36 minutes). Adding the solar panel, which produces ~10 W, should reduce the battery load to ~50 W, yielding a runtime of roughly 33 minutes. I’m not sure how the battery and solar panel managed to run for 42 minutes—this could be due to conservative battery ratings or lower-than-specified power draw. I’m not complaining.
Once the electronics were tested (although, in hindsight, this was an underwhelming amount of testing), I began thinking about the structure of the cooler. Originally, I wanted a small lunchbox-sized cooler. The 5 QT Laguna Ice Chest was very appealing, but I couldn’t find a solar panel small enough to attach to the top of the device, so I pivoted to the slightly larger 9 QT model.
Once the electronics were tested (although after assembling I realized this was an underwhelming amount of testing), I began to think about the structure of the cooler. Originally, I wanted a small lunchbox size cooler. The 5 QT version of the Laguna Ice Chest was very appealing. However, I couldn’t find a solar panel small enough to attach to the top of the the device , so I pivoted to the slightly larger 9 QT model.
Cooler Anatomy
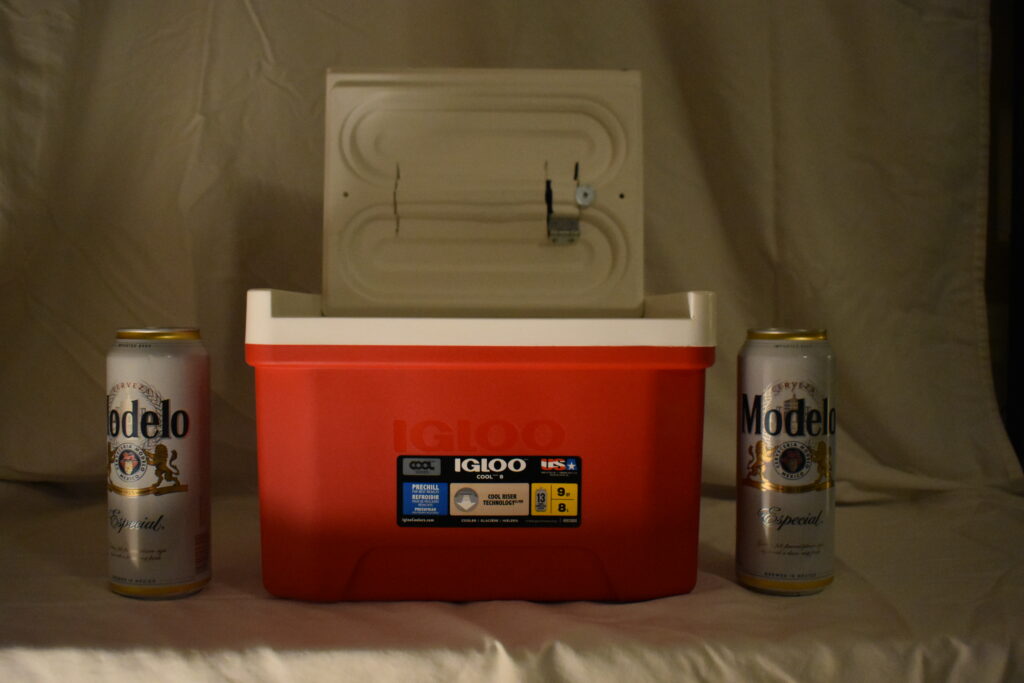
The way Igloo coolers are built is as follows: there is an inner chamber made of smooth white plastic. The cooler walls are about an inch thick. The outer wall is a coarse red plastic, and between the inner chamber and outer wall is a sealed layer of insulating foam.
The caveat is that the top of the cooler is hollow. It is asymmetrically shaped, with a design consisting of hollow corridors and two solid troughs.
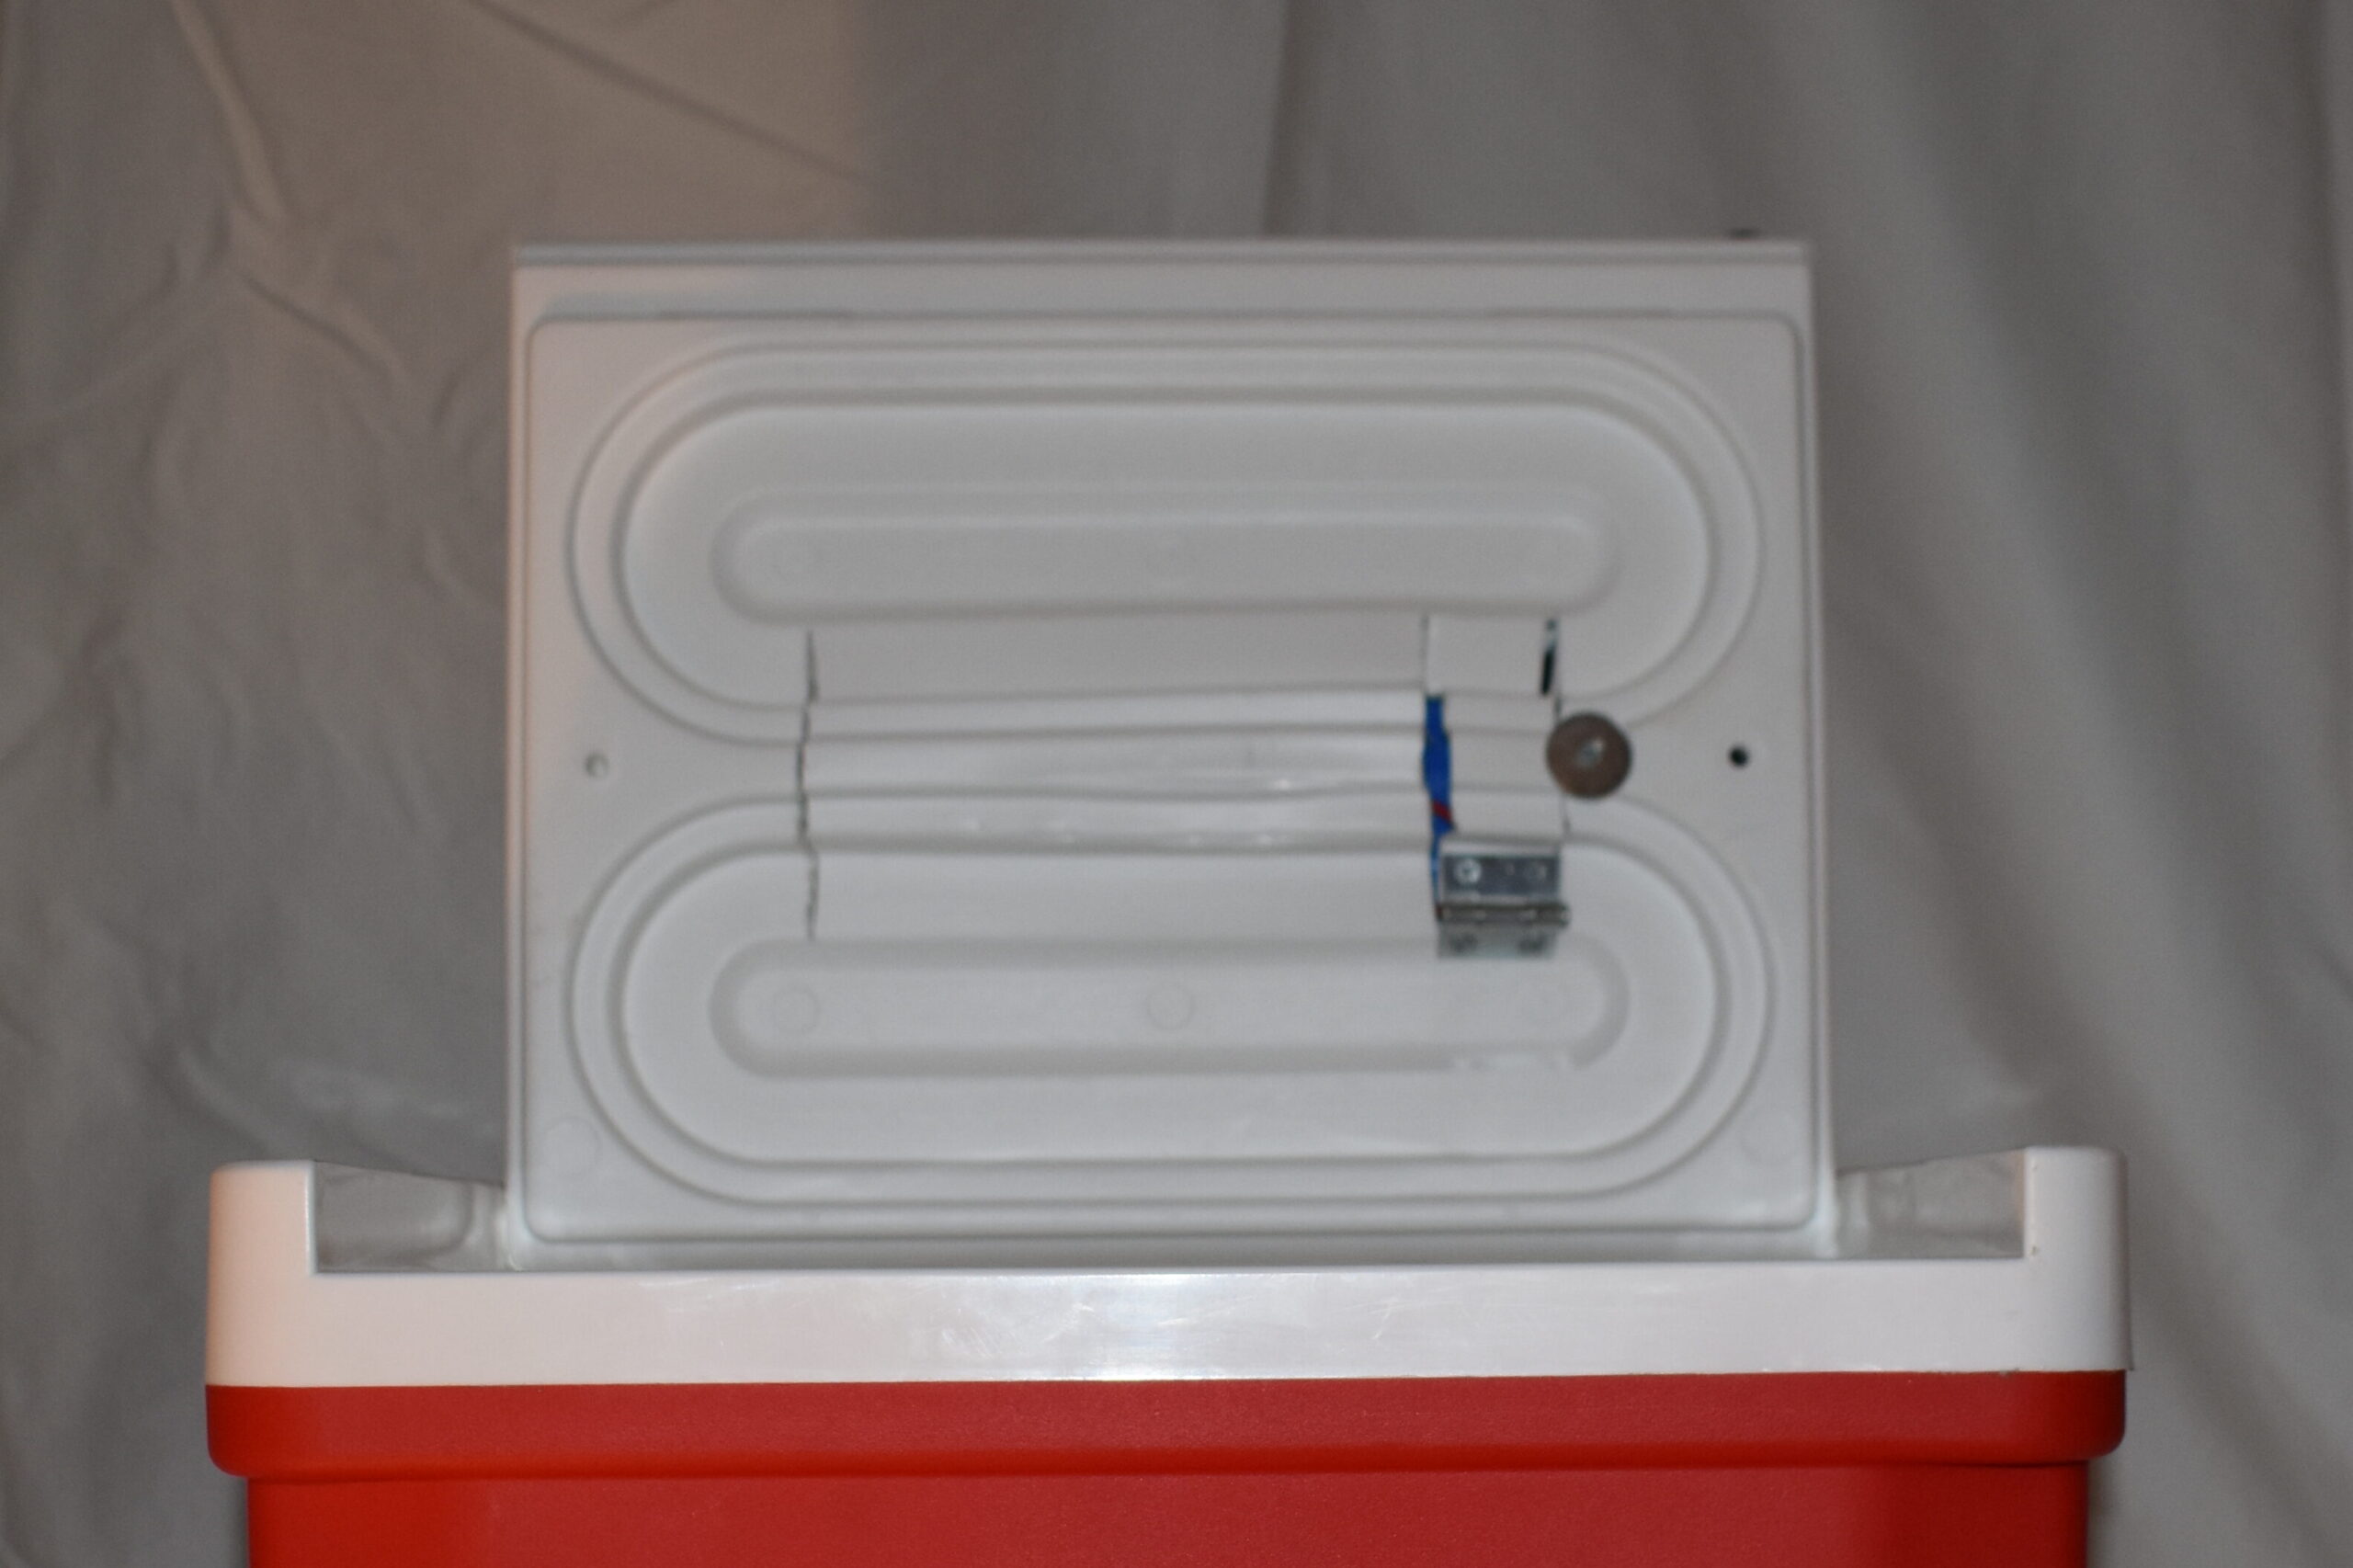
I exploited these open corridors in the top as a place to store the battery. Originally, I hoped the plastic would be thin enough to bend and allow the battery to slide into a cut in the roof. However, I found the plastic extremely resilient. Resilience is an admirable trait—unless one is resilient toward a lackluster idea.
A drug addict maintains amazing resilience in their commitment to consuming drugs despite the efforts of their family to prevent such behavior. Thus, I needed to coax the plastic out of its original form using my Genesis Dual Power heat gun. Once softened, I was able to pull the plastic into a more open cavern for the battery.
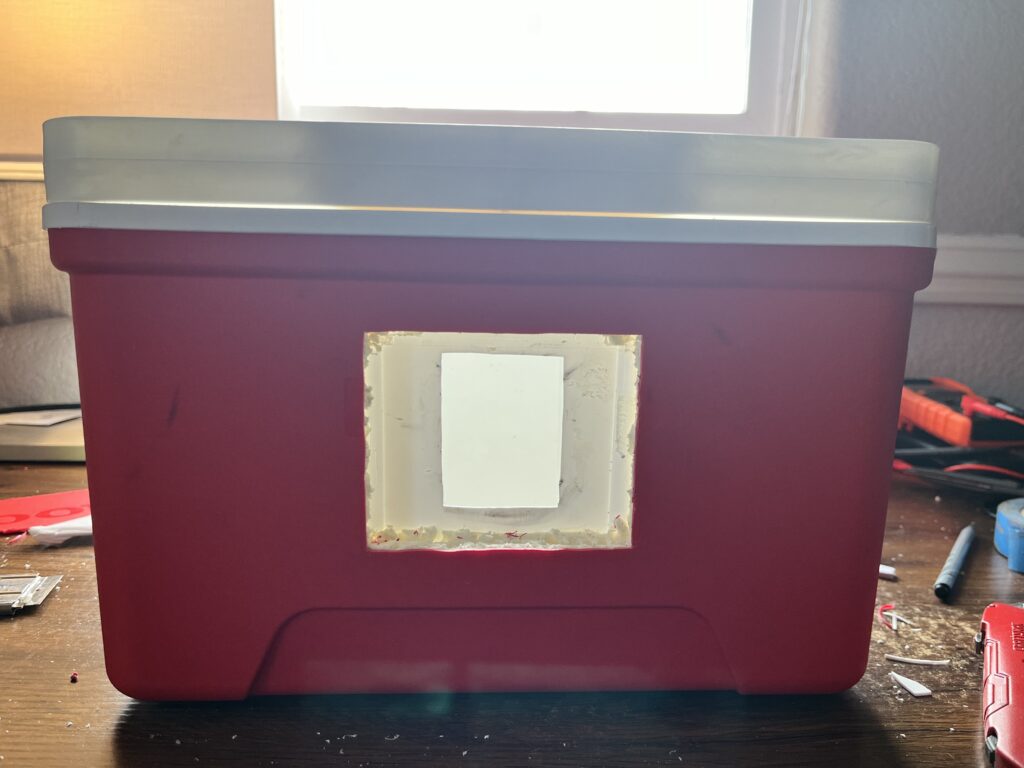
With a place for the battery, I drilled a hole and threaded the battery charger port through it, holding it in place with a ring of super glue.
At this point, I attached the solar panel to the top of the cooler. All this required were screws and washers to hold the panel in place.
Wiring the Top to the Fridge
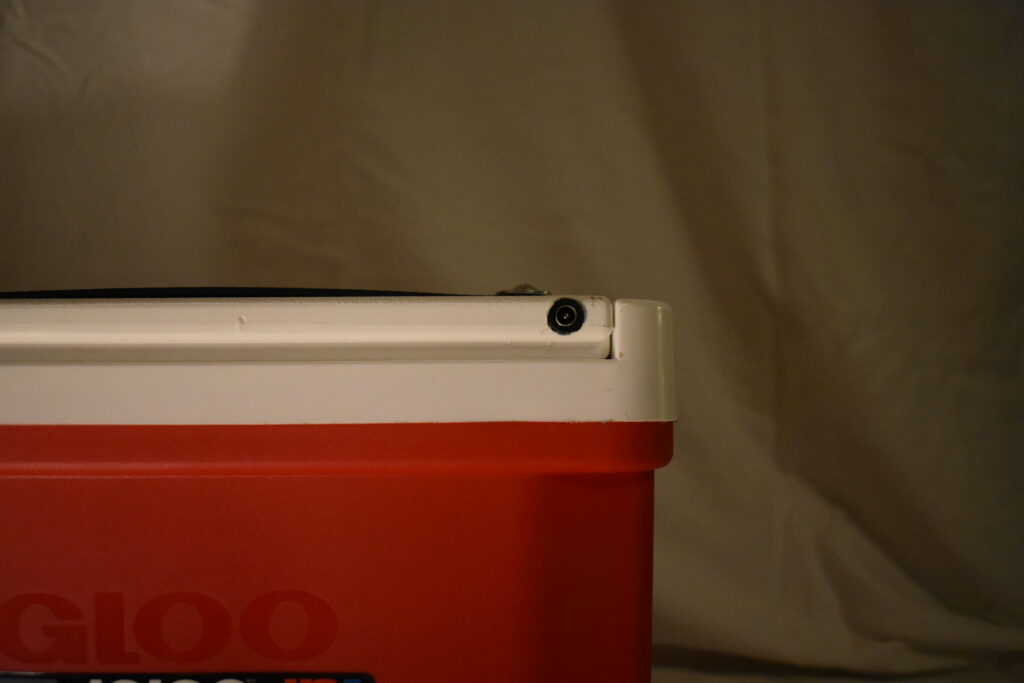
Next, I had to get power from the battery stored in the top to the fridge embedded in the side of the cooler. The top detaches from the body of the cooler at the hinges, which are just two plastic nubs that pop into ports on the body—similar to my plastic Oakley sunglasses.
I appreciate this design in my Oakleys because I feel comfortable throwing them into my backpack, knowing the arms will detach before the glasses break. Exploiting this design, I drilled a hole into one of the hinge nubs and its receiving port, allowing me to pass the power wires out of the top and along the side of the cooler body.


TA-DA!
With the top done, I could focus on installing the fridge.
Installing the Refrigeration Unit
Knowing the thickness of the cooler, my plan was for the small fan and heat sink to intrude into the inner chamber, while the large heat sink and fan would protrude from the exterior.
Using a Dremel, I cut into the outer shell and insulating foam. I then marked where the small fan and heat sink would penetrate the inner chamber and made an incision with a box cutter through the softer inner plastic.
To minimize the footprint of the fridge, I used a metal-cutting attachment to clip the wings off the large aluminum heat sink. The Dremel is a remarkably versatile tool, but it lacks power; cutting the aluminum took a long time, and I’m fairly certain I inhaled a toxic amount of aluminum dust. I tried not to.

The final piece of hardware to install was the on/off switch. I placed it next to the fridge. It was almost too thick, but by clearing out insulation I was able to sandwich it between the inner chamber and outer shell. After threading the toggle through a drilled hole, all that remained was wiring everything together.
Because of the lack of space, wiring was an exercise in pure finagling. Soldering with my novice setup led to further inhalation of noxious gases and several burnt fingertips, but eventually I connected everything successfully.
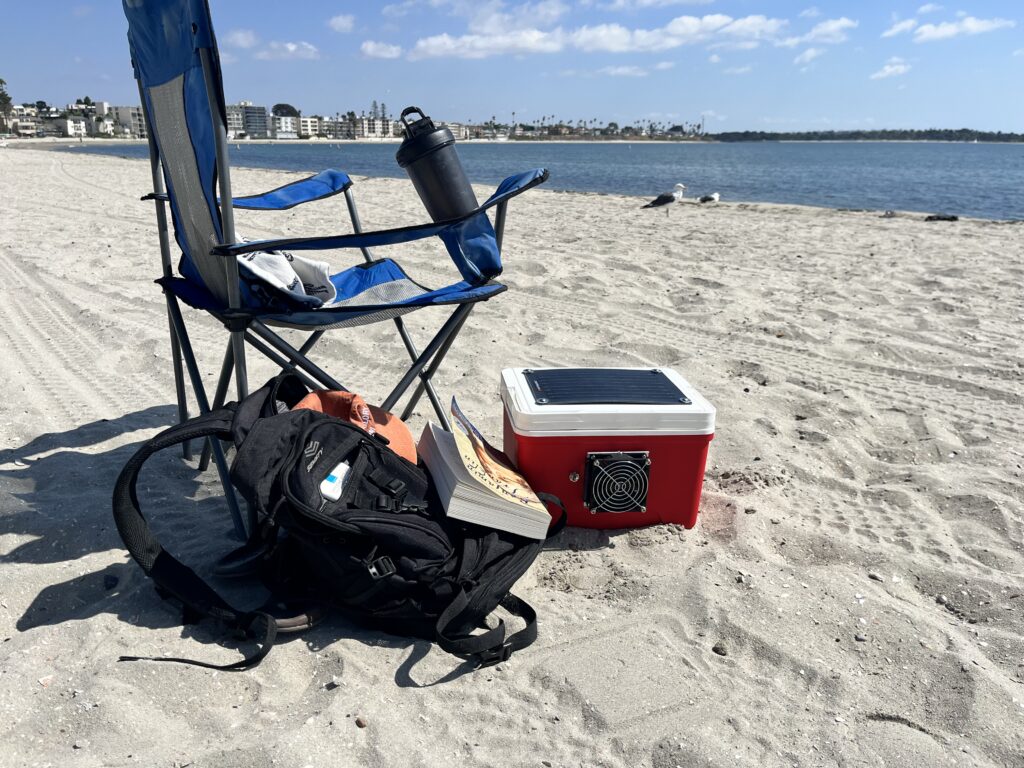
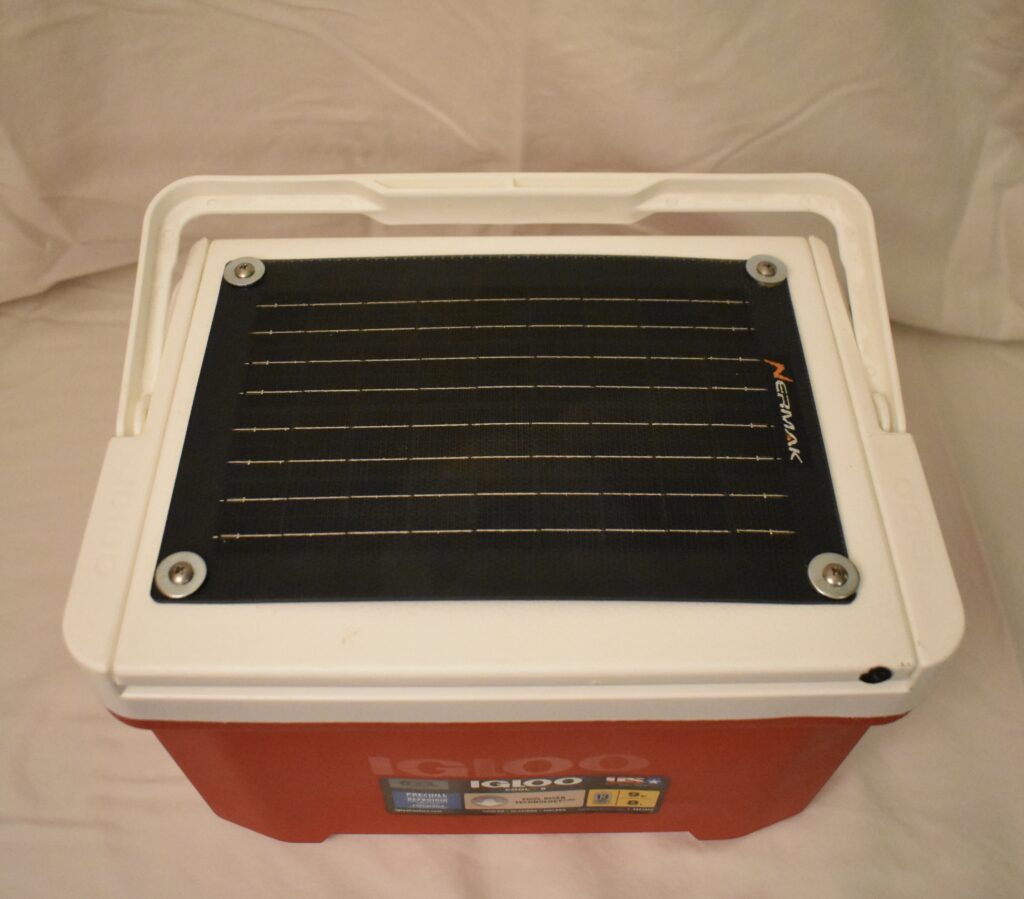
The final product:
Additional Notes
After polishing off the last task and giving the cooler a good wipe-down, I was extremely pleased with how it turned out. It looks professional, the wiring is clean and integrated, and the refrigeration unit works.
However, it is not nearly as powerful as I had hoped.
My initial test involved placing two warm tall-boy Modelos in the cooler and running the system until it ran out of juice. When I opened the cooler, it wasn’t very cold. The beers were noticeably cooler, but nowhere near the effect of a cooler full of ice.
The takeaway from this preliminary model is that the cooling system works best as a supplement to an ice pack rather than a replacement. In a second iteration, I would include additional testing:
- How long does it take to charge the battery?
- Can I make the solar panel charge the battery?
- Thermometer readings of internal cooler temperature
I’m also questioning the importance of the solar panel. It contributes little to total power and currently cannot charge the battery. Would removing it actually be beneficial? Given that it’s the most expensive component, I’m leaning toward no, but it’s debatable.
Another feature I’m considering is adding a second battery and refrigeration unit, which would undoubtedly improve cooling performance.
Finally, in a future model, I would significantly change my approach to the top of the cooler. I would deconstruct it further and rebuild it with custom plastic components that are more aesthetically pleasing and allow for a more uniform, accessible battery compartment. I may even spray insulation into the top to improve thermal performance and prevent battery heat from entering the inner chamber.